Logging into Google Wave for the first time is a baffling experience. It is almost impossible to work out what to do without the help of others, so I thought I’d create a really simple, step-by-step guide to get you started.
Step 1: Find some Friends
The first thing you need to do is to find some people to connect with. The problem is that not many people are signed up yet and even if they are, you probably don’t know their google wave address.
If you are lucky enough to know their google wave address (mine is farmlanebooks (at) goooglewave (dot) com) then you can add the person using the little + button next to the words manage contacts in the bottom left of the screen.
If you’d like to find some book bloggers then I’ve created this wave:
[wave id=”googlewave.com!w+kNwYIiY_C” height=”200px” server=”https://wave.google.com/wave/”]
Just log in and add yourself to it, then click on the avatar of anyone you recognise and add them to your contacts. Once you are following this wave it will be easy for me (or others) to add you to the other book blogging waves.
Step 2: Find Some Waves
The next thing you need to do is find a few waves to read, so that you can start to join in. The best place to start is probably with waves which are open for everyone to see.
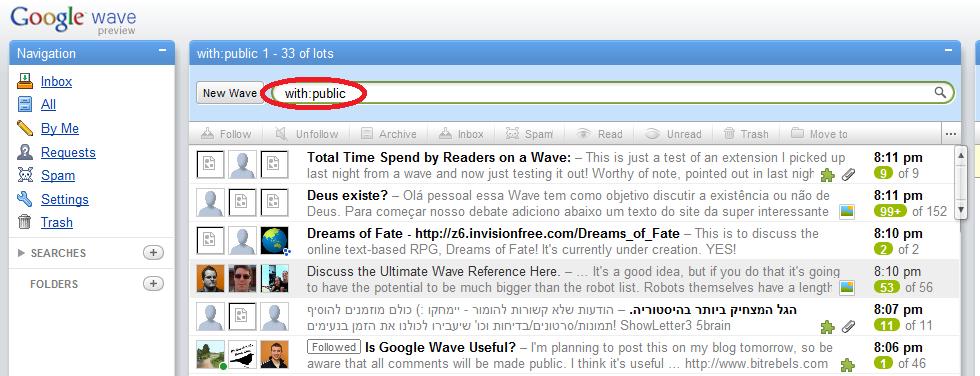
To find public waves, type with:public into your search box and then click on the magnifying glass. This will bring up all waves which are viewable by everyone. You can refine this search by including keywords, after the word public, for example with:public FAQ will bring up waves with frequently asked questions, or with:public books will produce a list of waves in which books are mentioned.

Once you know some-one’s google wave address you can search for waves in which they’re participating in a similar way – for example with:farmlanebooks will bring up all waves which I am currently following.
Step 3: Create a Wave
When you are ready to start a discussion, just click on the New Wave button at the top of the centre panel. Type your message in the box in the right-hand column, then add people you’d like to share your conversation with using the + button next to your avatar. You can make the wave public by adding public@a.googlewave.com as a participant. (you’ll need to add public@a.googlewave.com to your contact list before you do this)
Step 4: Enjoy Google Wave!
Hopefully, this post will provide enough information to get you started, but if there is anything you’d like to know, then just ask and I’ll do my best to find out the answer for you.
Are you managing to wave successfully now?
Do you have any hints for new users?